Category: Summer

Korean Honey Butter Corn

Korean Honey Butter Corn

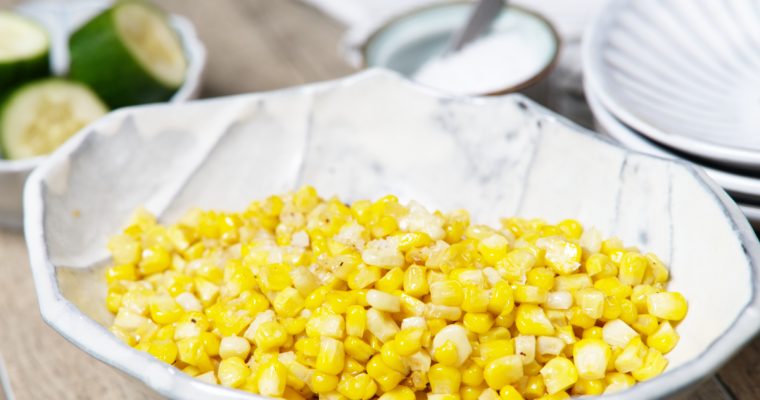
When summer corn is at its peak, you really don’t have to do much. But if you want to take it just one step further—without masking its natural sweetness—this quick stovetop Korean Honey Butter Corn is the move. It’s buttery, slightly sticky from the honey, read more
Chilled Watermelon Cucumber Soup

Chilled Watermelon Cucumber Soup

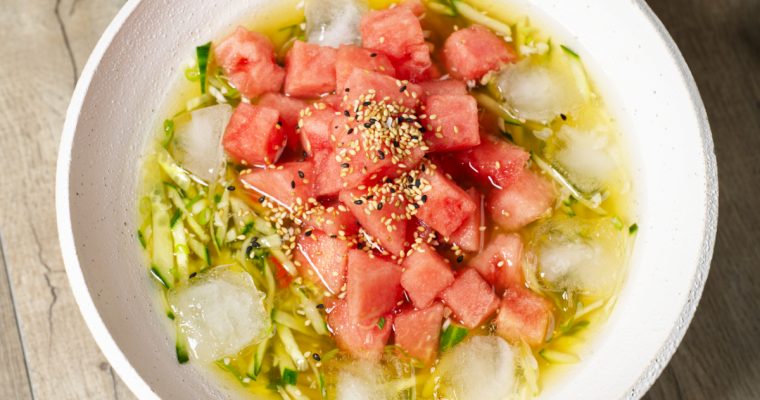
When it’s a million degrees out and even the thought of turning on the stove makes you sweat, this Chilled Watermelon Cucumber Soup comes to the rescue. It’s light, hydrating, and bursting with flavor—basically the edible version of jumping into a cold pool. Crisp cucumbers read more
Strawberries and Milk

Strawberries and Milk

I used to think my mom made this up. When I was little, she’d serve us bowls of strawberries and let us mash them up, drizzle in a little honey or a sprinkling of sugar, and pour cold milk over the whole thing. The strawberries would tint the milk this delicate, dreamy pink, and my sisters and I would eat it with a spoon straight from the bowl. For the longest time, I assumed it was just one of those quirky “Mom things”, probably a way to make sure we ate more fruit while getting some calcium.

But it turns out strawberries and milk—ichigo to miruku—is actually a classic snack in Japan. You’ll find more stylized versions of it in cafés and cookbooks and all over Japanese social media during strawberry season. Strawberries and milk is a popular flavor combination that shows up in candies, cakes, even sandwiches. But even though there are store-bought options and recipes that involve cooking the strawberries into a syrup, I still love my mom’s version best: just fresh berries, sweetened a bit, and mixed with milk.

It’s incredibly simple, endlessly customizable, and honestly the most perfect thing to make when it’s way too hot to cook. I use maple syrup now instead of sugar (my grown-up twist), and pour it over whatever milk I have in the fridge—dairy, oat, soy, you name it. To vegan or not vegan, it’s a choose your own adventure kind of thing. Strawberries and Milk is refreshing, nostalgic, and summer ready, so let’s get into it.

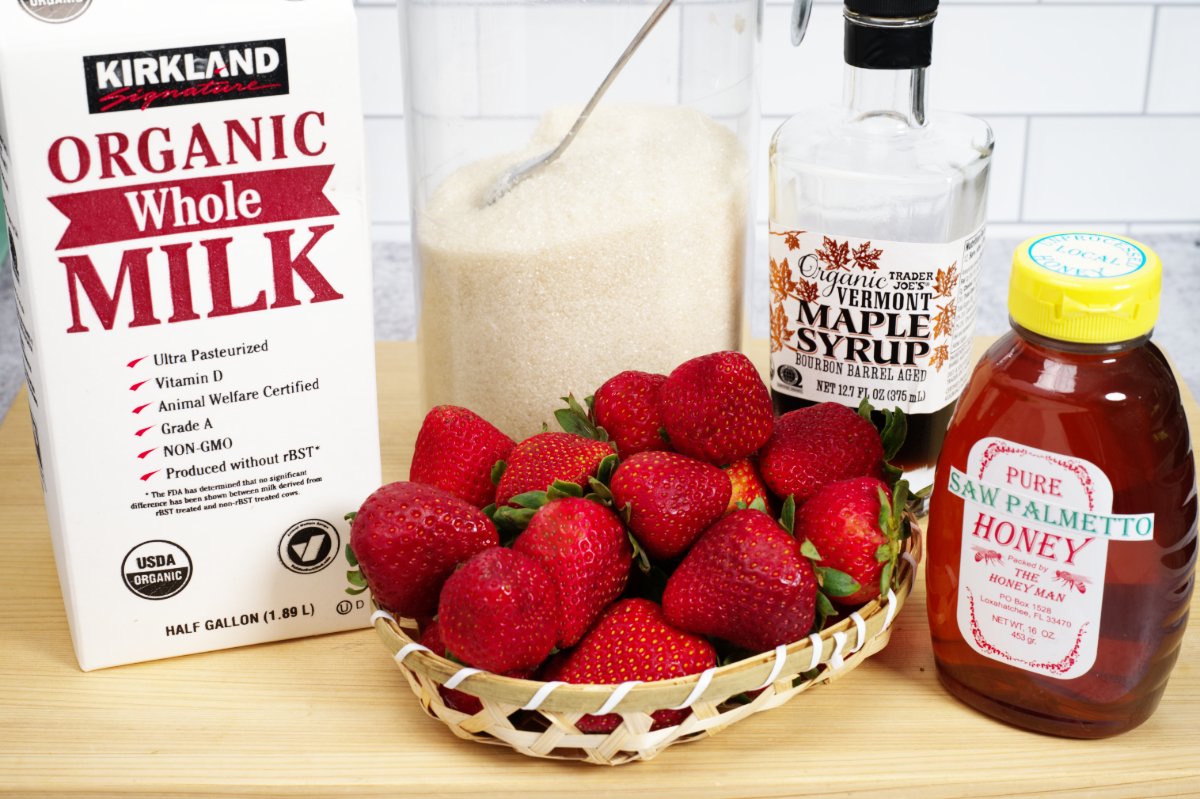
pic of ingredients for strawberries and milk

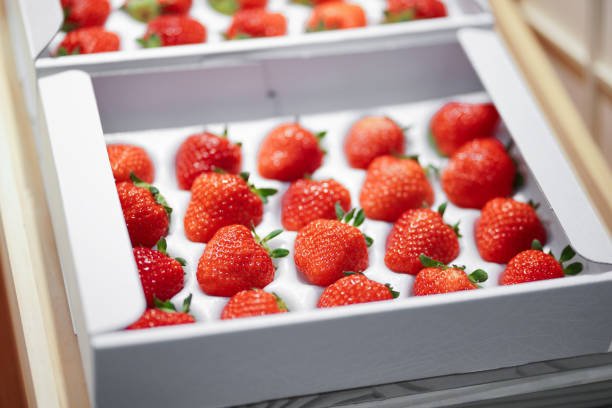
It makes sense that this little snack has such popularity in Japan, where strawberries are practically a cultural treasure. Some varieties are so valued they’re sold in gift boxes, each one carefully packed and nestled like a jewel.

boxed strawberries from japan

They’re sweet, delicate, and celebrated during peak season—especially around early spring, when the most famous varieties are at their best. And so a recipe like this, which so few ingredients, really lets this prized fruit shine. I look for the best strawberries the season has to offer; this is the time to go to your favorite farmer’s market and pick out the most fragrant and ripe berries you can get your hands on.

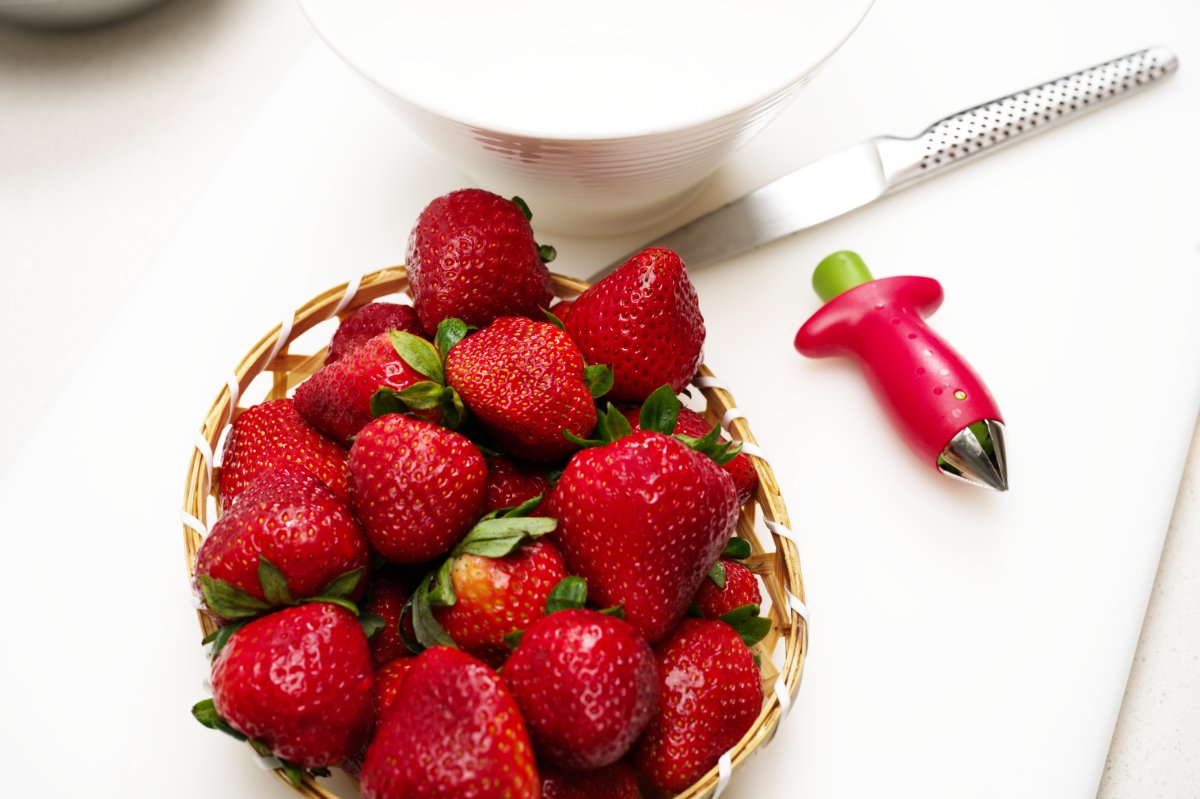
photo of the berries before making strawberries and milk

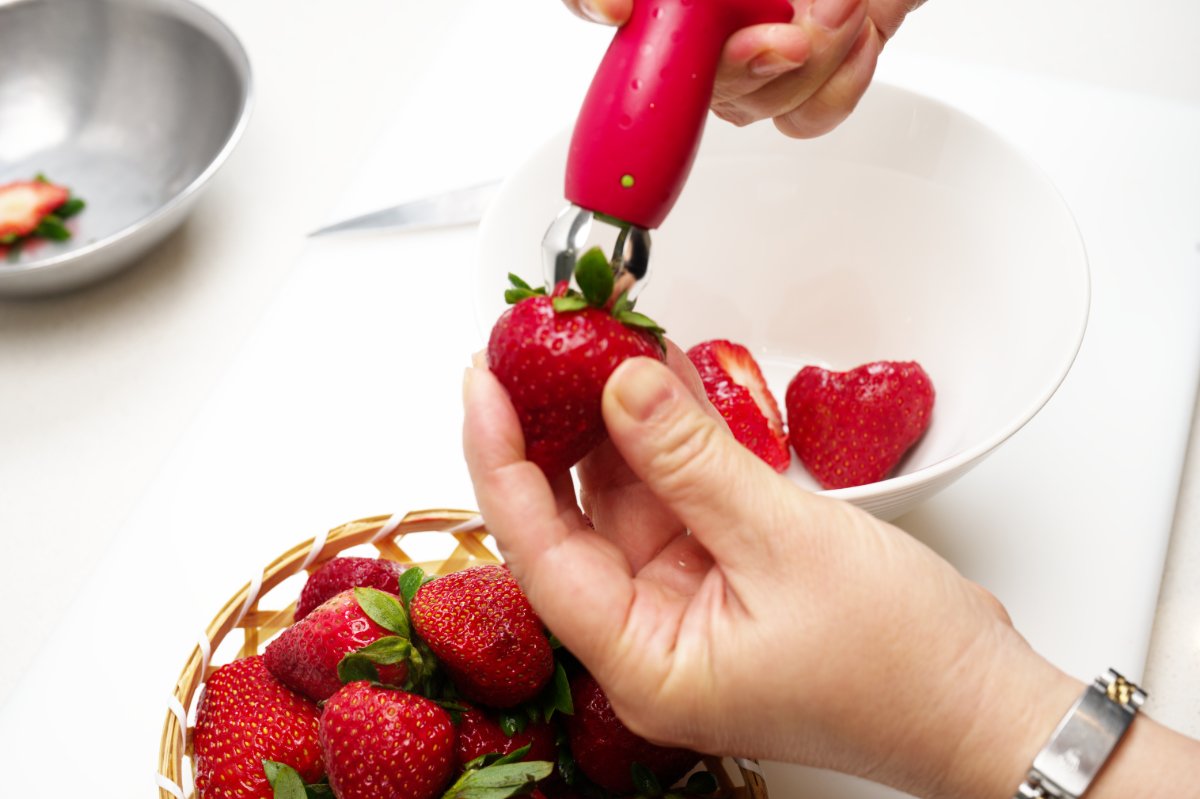
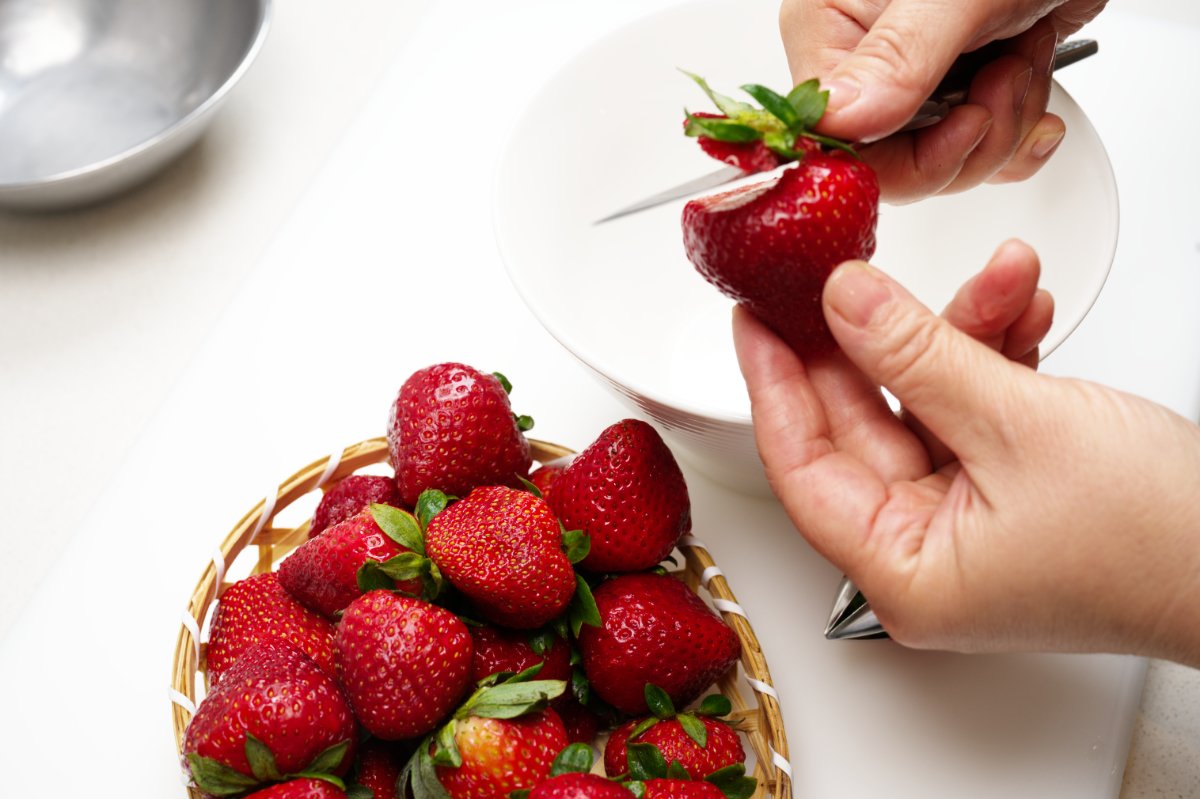
The process is so embarrassingly easy, but sharing is caring, so here we go: I start by hulling my strawberries. You can use a little gadget like this huller to remove the stem and the white core underneath, leaving just the juicy and sweet berry. To be frank, I’m not a gadget girl but remembered seeing this tool in a drawer. I implore you not to buy this single purpose, not even very sharp or helpful tool. Instead, use a pairing knife and you’ll thank me.

hulling strawberries with gadget

Old school is definitely the best choice…

using a knife to remove stem from strawberries

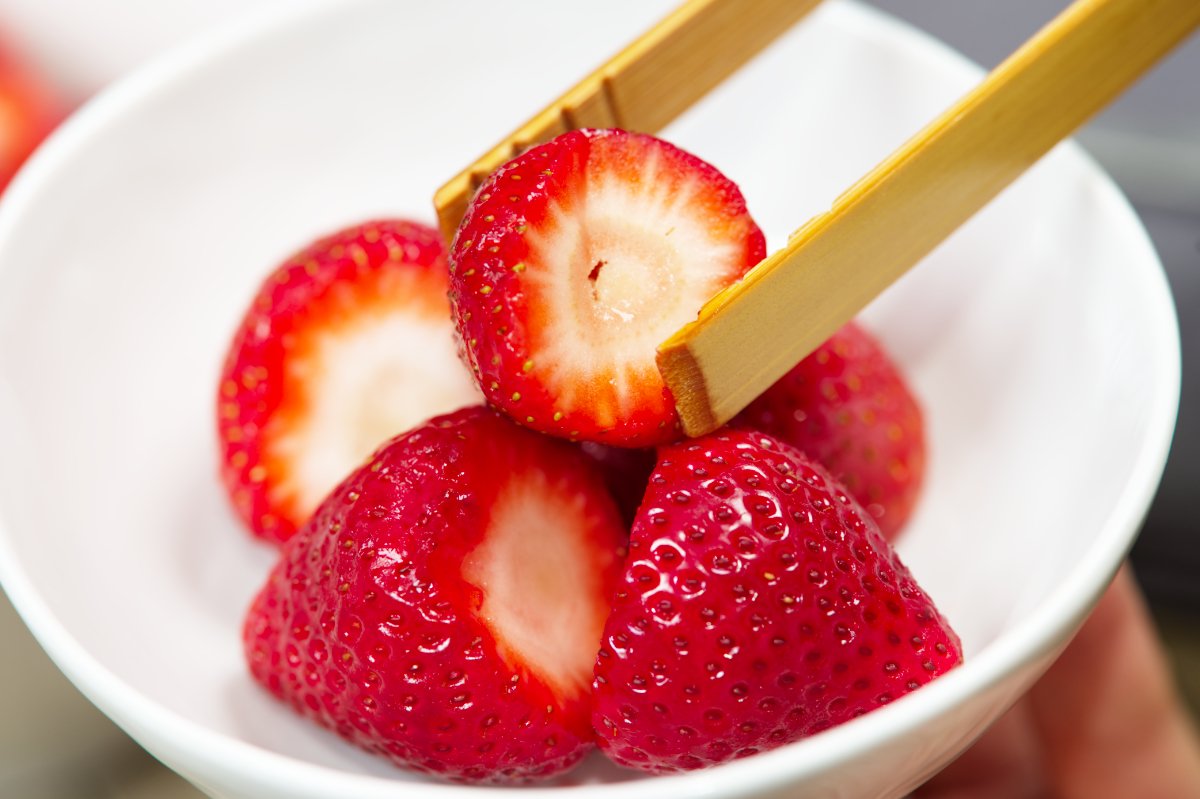
Then I put the strawberries into serving bowls.

putting strawberries into bowls for strawberries and milk

Truly, this is the greatest snack or quick breakfast for parents. Kids have a great deal of energy in the morning, particularly boys like my nephews. They want to do something immediately. If you’re not a morning person like me, you’ll love the fact that mashing strawberries takes some work and gives kids an easy task. Mash it with big chunks left or let them spend some time, work off some energy, and go to town on those berries yielding a smoother paste. Make sure you use a large enough bowl if you have younger kids to contain any potential mess.

mashing the strawberries with a fork

I like mine with big chunks ;)

mashing the berries juice

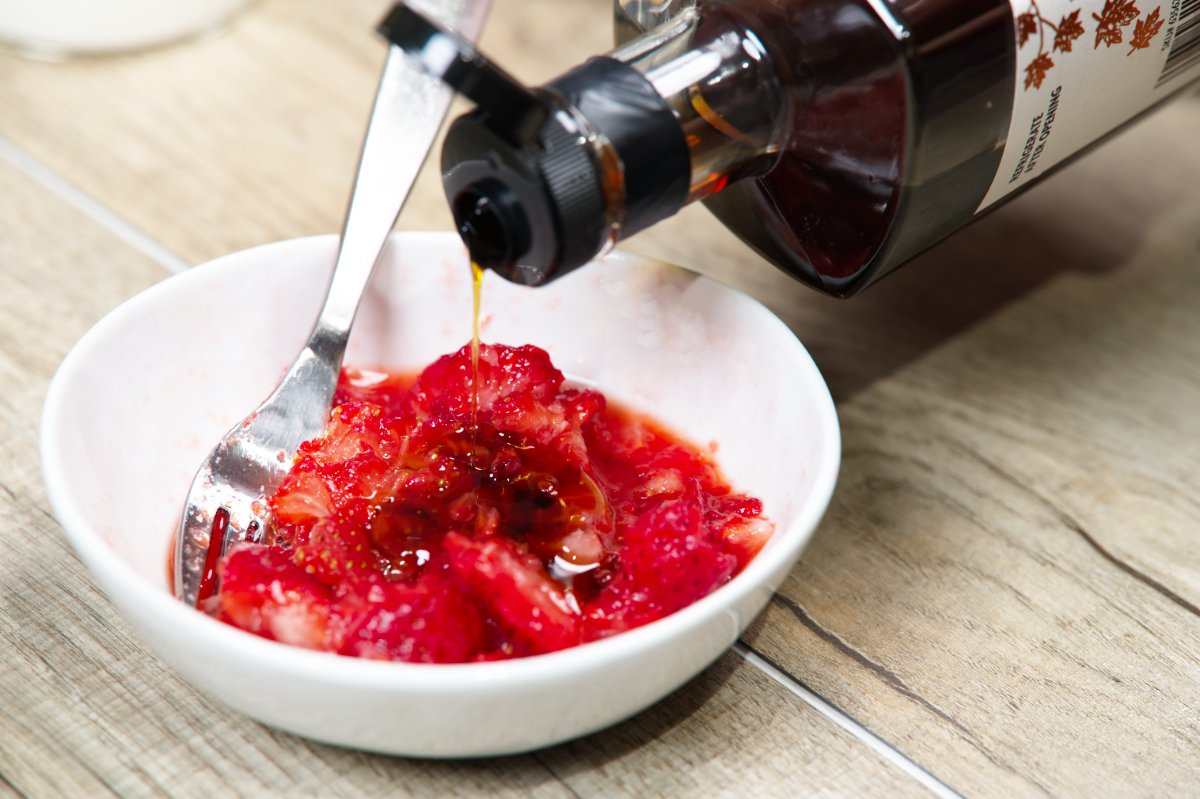
Then it’s time to pick your sweetener. Growing up, my mom always used plain white sugar. As kids, we loved the sugary gritty milk at the bottom of the bowl that waited for us at the end- like an extra little treat. But these days I usually reach for maple syrup—it blends easily and adds a little extra depth. Honey is nice too. Really any sweetener that you have on hand is fine. Start by tasting your strawberries—if they’re super ripe and sweet, you might not need much at all. If they’re a little tart, a bit more sweetener will help coax out their flavor.


adding syrup to the mashed strawberries

And just like with the sweetener, you can choose your own milk. Plant-based options like oat, almond, soy, even coconut all work beautifully here. Whether you use dairy or nondairy, you’ll end up with a Strawberry and Milk that’s berry delicious. Come on, I’m Gen X—of course I had to sneak in a Strawberry Shortcake reference somewhere!

feature recipe strawberries and milk

And with that, your summery treat is ready to be enjoyed!

pic of the strawberries and milk ready to eat

I hope this nostalgic snack brings you the same simple joy it has always brought me. Savoring seasonal treats is one way to bring a little dose of childlike happiness even in our adult doom-scrolling world… Take a few minutes to make this sweet treat and let me know what you think. And remember to tag us in  your pics @funkyasiankitchen, we love hearing from you!


And if you’re looking for more simple summer treats, check out my Strawberry Lychee Lemonade, Tropical Fruit Salad, or Avocado Smoothie.


Print
clock clock iconcutlery cutlery iconflag flag iconfolder folder iconinstagram instagram iconpinterest pinterest iconfacebook facebook iconprint print iconsquares squares iconheart heart iconheart solid heart solid icon
recipe card strawberries and milk

Strawberries and Milk

  • Author: Funky Asian Kitchen
  • Prep Time: 5 minutes
  • Total Time: 5 minutes
  • Yield: serves 2
  • Category: snacks, sweets
  • Cuisine: Japanese

Ingredients

Scale
  • 2 cups strawberries, about a dozen 
  • 1 cup milk, or plant milk
  • A couple teaspoons honey, maple syrup, or sugar

Instructions

Prepare the strawberries: Cut the stems off of the strawberries and place them into 2  bowls. 

Serve the strawberries with the milk and sweetener on the side. Mash the strawberries with the back of a fork, pour milk over the strawberries, and season with sweetener to taste. Eat immediately with a spoon or fork.


Notes

*Strawberries are acidic so the milk will start to curdle slightly as it sits. This does not affect the taste and shouldn’t keep you from enjoying your berries.

Keywords: chilled, no cook, summer, strawberries, fruit, easy, comfort food, quick, snacks

Chilled Tofu Terrine

Chilled Tofu Terrine

Chilled Tofu Terrine is one of those dishes that looks incredibly elegant, but is actually super simple to make. There’s no oven involved, barely any cooking, and it can be made ahead—perfect for warm weather days when the last thing you want is to stand read more
Octopus Ceviche

Octopus Ceviche

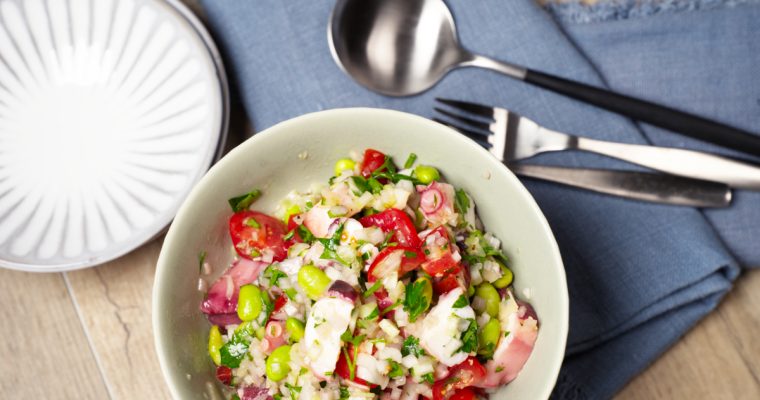
Octopus is enjoyed in many coastal cuisines around the world, and Japan is no exception. From takoyaki (savory octopus-filled dumplings) to sushi and sashimi, octopus—known as tako in Japanese—is a staple ingredient, prized for its mild sweetness and satisfying bite. It’s also incredibly popular in read more
Chocolate Zucchini Cake

Chocolate Zucchini Cake

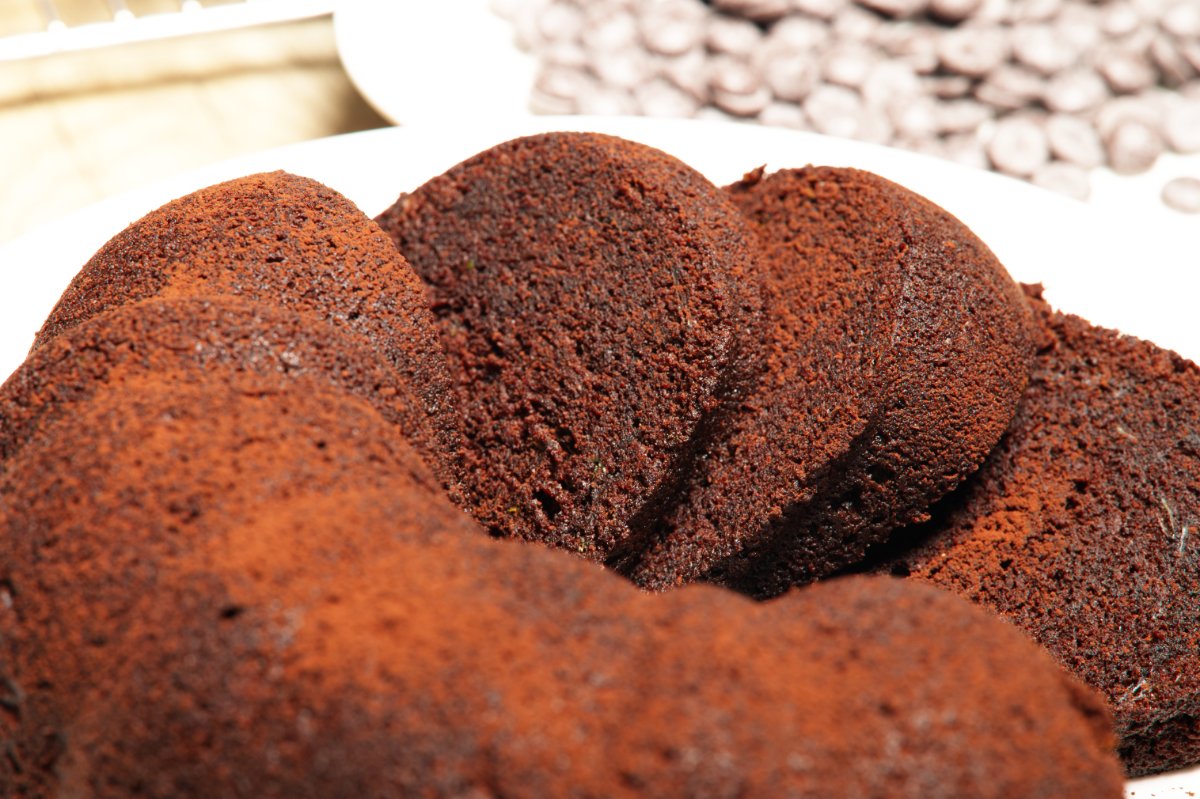
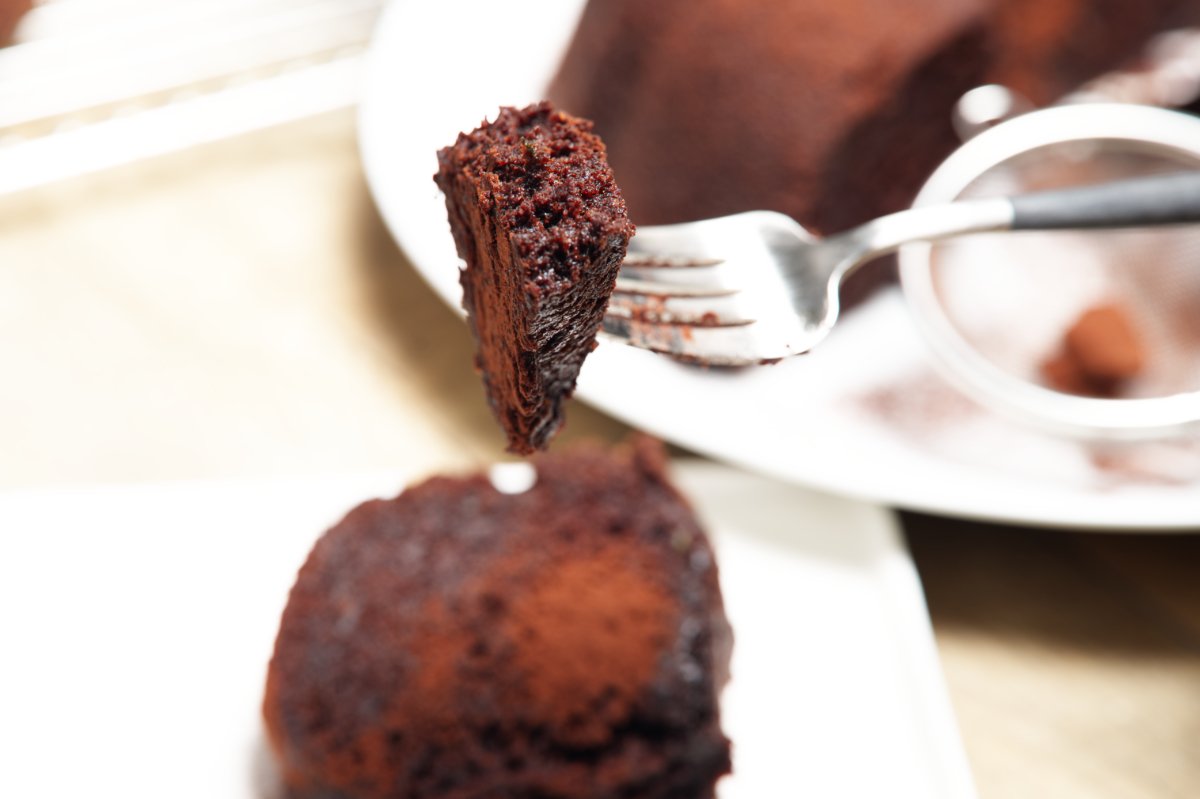
If there’s one cake you could feel good about serving for breakfast or sneaking into a lunch box, this Chocolate Zucchini Cake is it. I mean chocolate is a Superfood and zucchini is a nutrient rich vegetable, this is starting to sound like the breakfast of champions! While it does have its fair share of sugar (because, let’s be real, it is still a cake!), the zucchini adds a wholesome touch. And with the abundance of zucchini this time of year, why not put it to delicious use? If you’ve never baked with zucchini before, don’t worry. There is no veggie taste, the zucchini blends seamlessly into the batter and keeps this fudgy and decadent tasting cake super moist. If you’ve been disappointed by lackluster chocolate cakes before, let this cake show you how amazing they can be. My Chocolate Zucchini Cake may look humble, but it is a chocolatey treat you are going to crave morning, noon, and night, so let’s get into it.


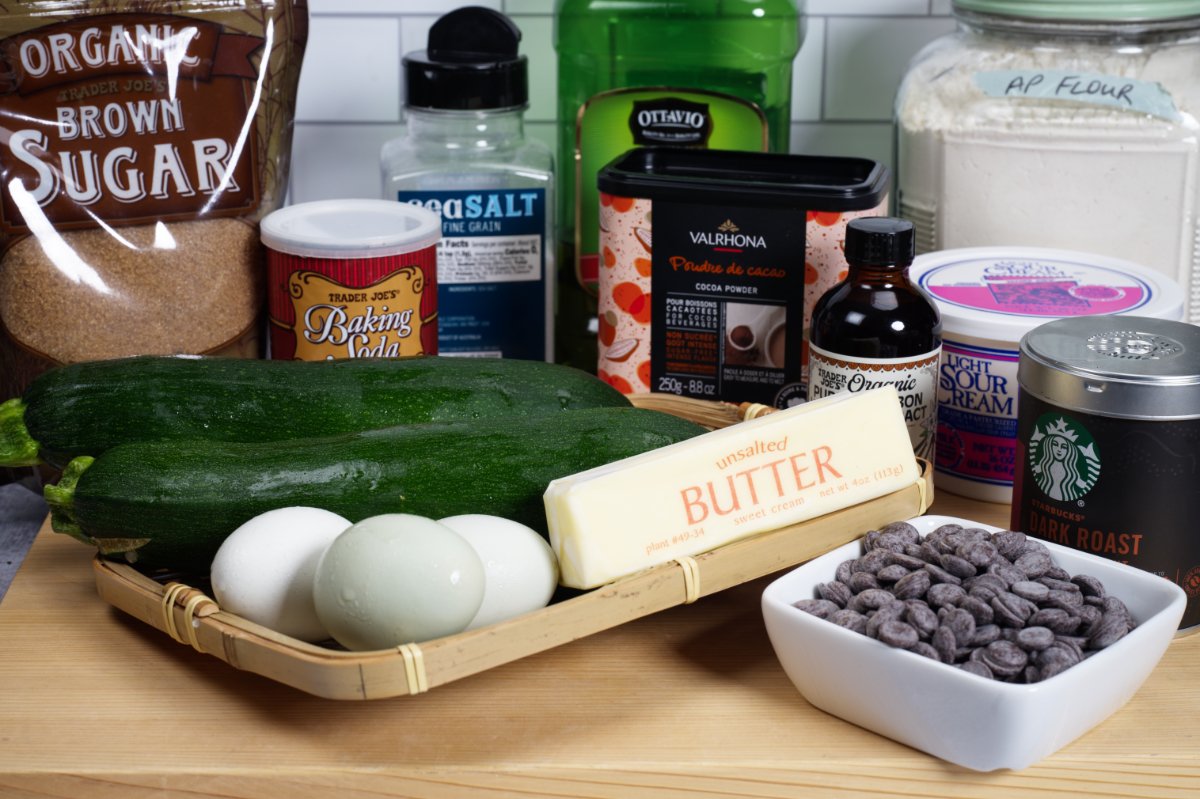
photo of the chocolate zucchini cake ingredients

Baking is not my comfort zone. And that’s the reason why I always use a digital scale to weigh ingredients-the scale never lies. And unlike cooking, baking is a science. If you don’t follow the rules, you may not always get what you want. But using a scale ensures you’re getting the exact measurements every time. Flour, sugar, and other ingredients can vary a lot depending on how they’re scooped or packed into measuring cups, but a scale takes out the guesswork. It also makes it easier to follow recipes from around the world, which often use weight measurements. Once you get into the habit, you’ll wonder how you ever baked without it!

I get it—not everyone has a kitchen scale and maybe you don’t want to invest in one if you don’t bake that often, which is why I always include standard measurements in my recipes, too. However, if you’re using cups to measure dry ingredients like flour or sugar, make sure to use the ‘spoon and level’ method. Instead of scooping directly from the bag, lightly spoon the ingredient into the measuring cup and then level it off with a straight edge. This prevents you from accidentally packing too much into the cup, which can throw off the balance of the recipe.

It’s important to have everything prepped and measured and ready to go when baking. It will make your life so much easier and you’ll feel just like you’re on the Great British Bake Off when you reach for your ingredients.

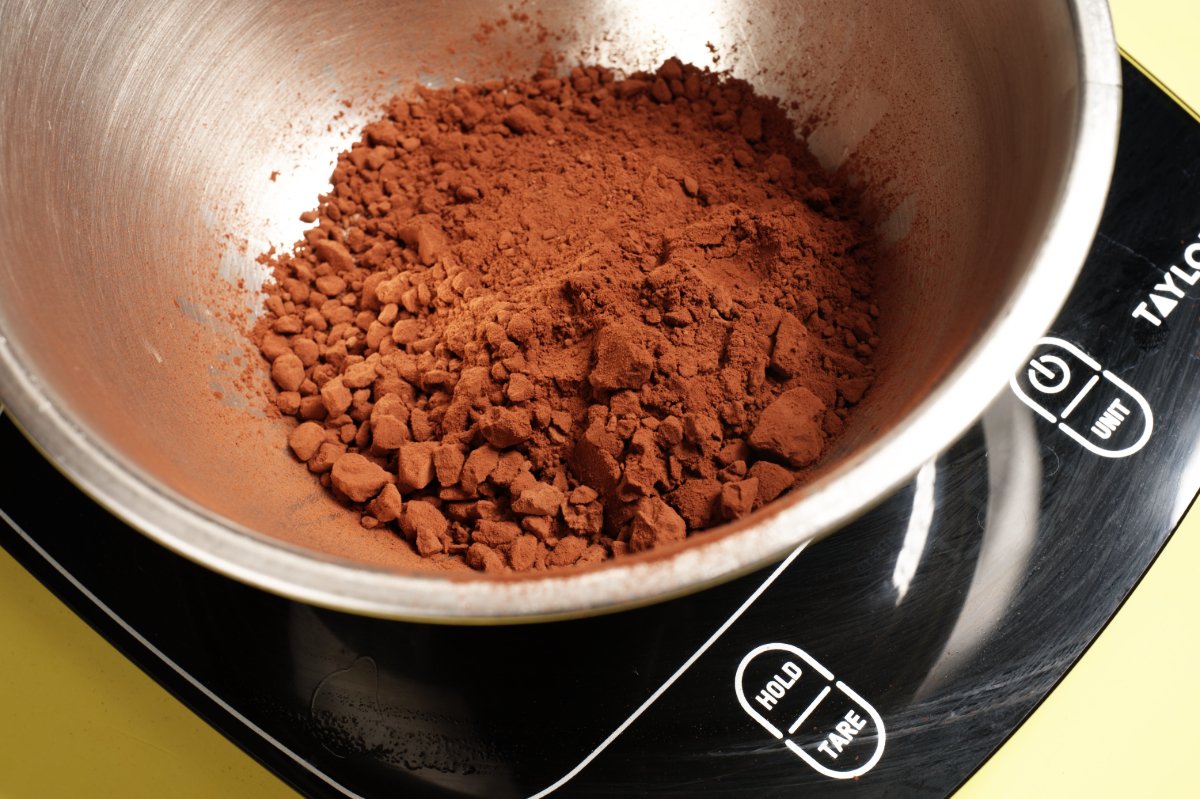
weighing flour and cocoa

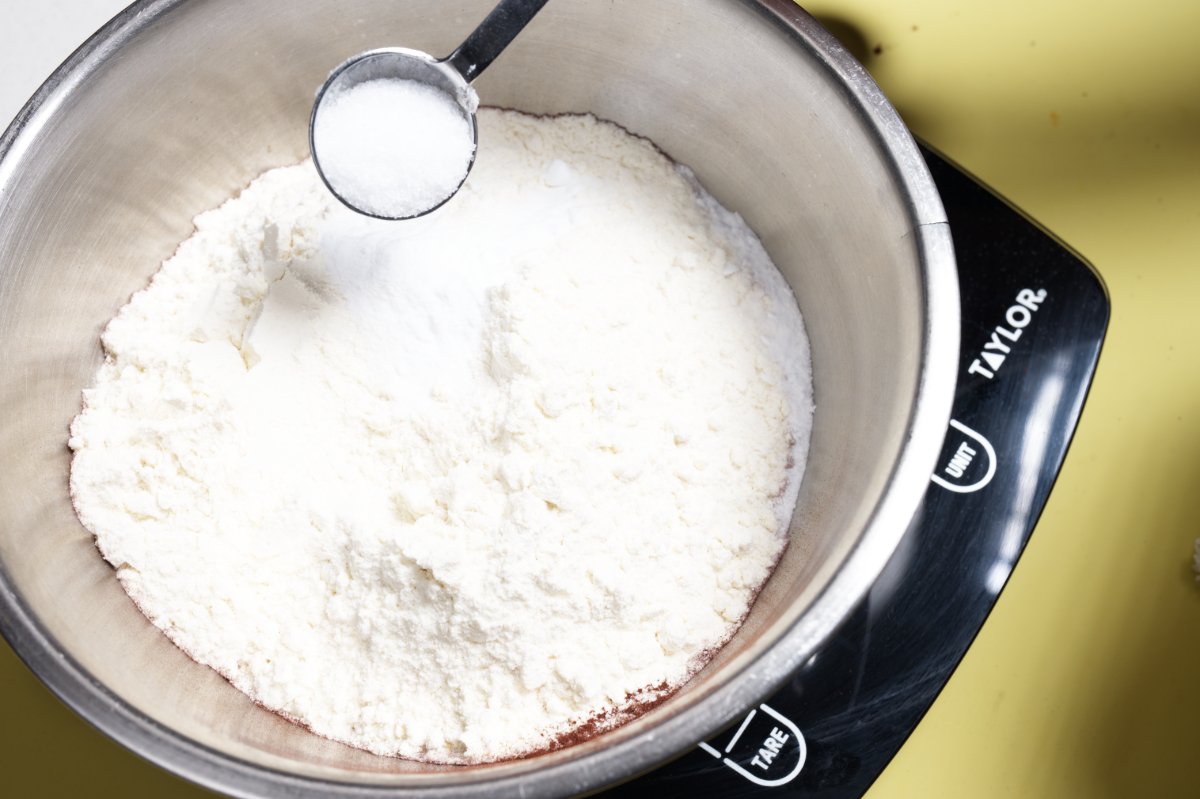
Then I add the salt. Never skip the salt in a baking recipe-baked goods taste flat without it. I grew up in an Asian household and we never had Kosher salt, so I just use sea salt in all of my recipes, even baking ones. It’s one less thing to keep on hand. So if you’re like me, and you don’t have Kosher salt, you can definitely use sea salt, just use less to account for the smaller grains.

photo adding salt

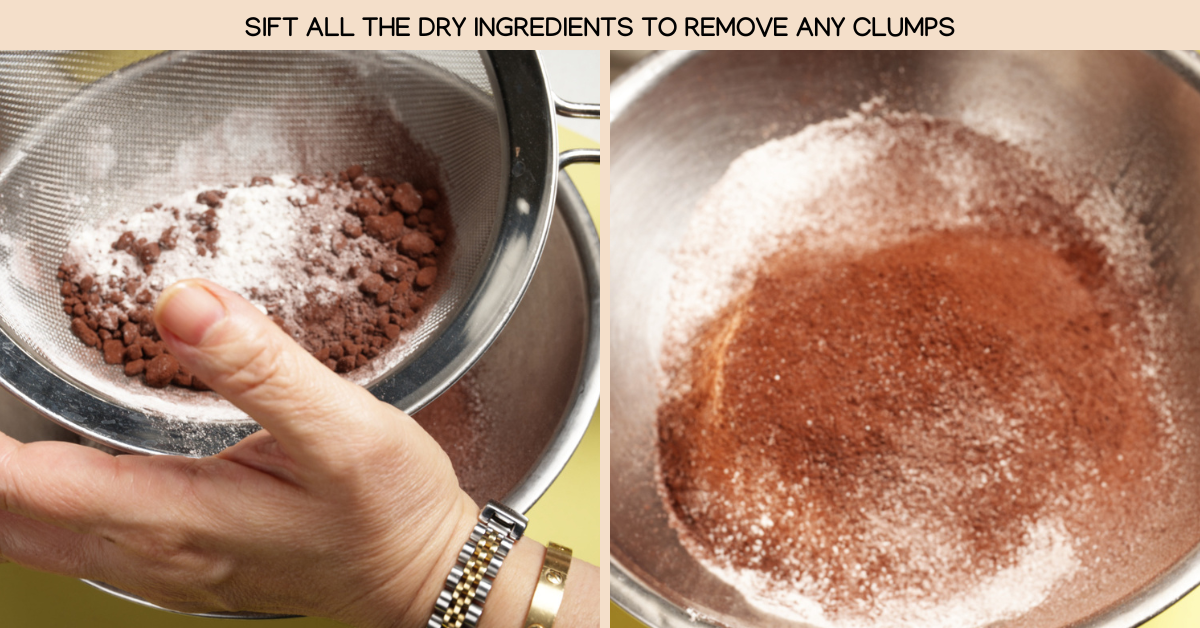
photo of sifting dry ingredients

Sifting is a pain, I get it. One more bowl and the sieve to wash. But don’t skip it. Cocoa powder is very clumpy and if you live in a place with humidity, like me, it’s even more clumpy. Nothing ruins a cake quite like a chunk of unmixed cocoa powder. So take the extra step. And while we’re on the topic of cocoa powder, look for a good one. I only use dutched cocoas which include an additional step to neutralize the acidity (a process developed by a Dutch chemist, hence the name). Dutch-processed cocoa powders are not all equal; some of them look dark and fudgy but are in fact bitter and almost burnt tasting. My go to is Valrhona cocoa powder, which I love for its strong, rich flavor. But Scharffen Berger, Droste, and Guittard are all great too.

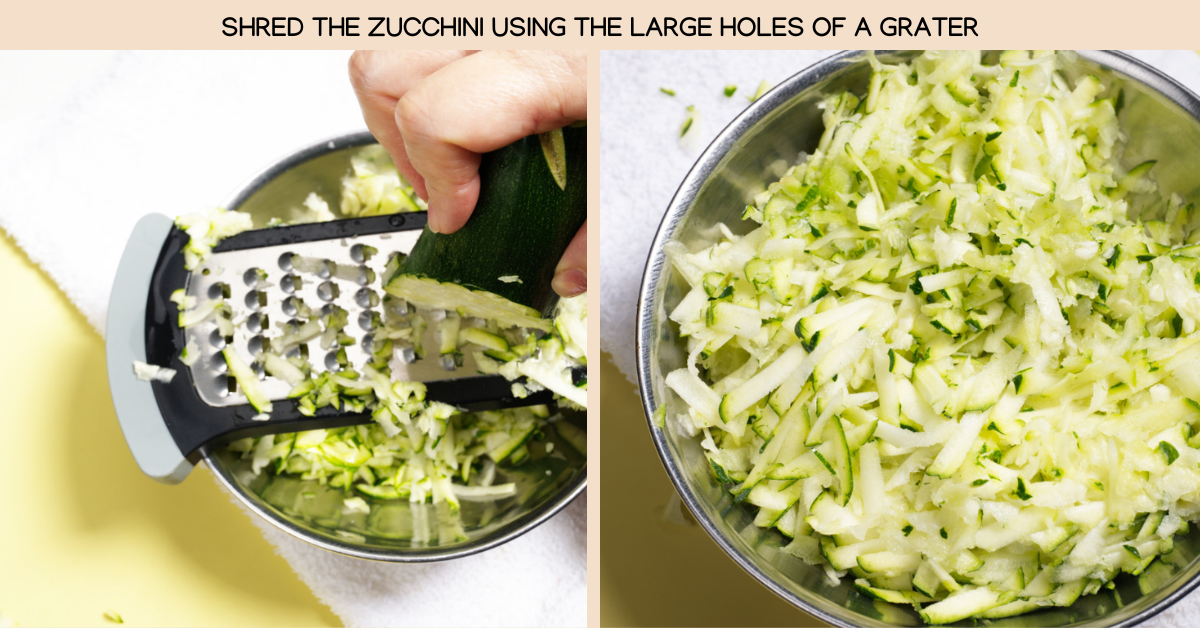
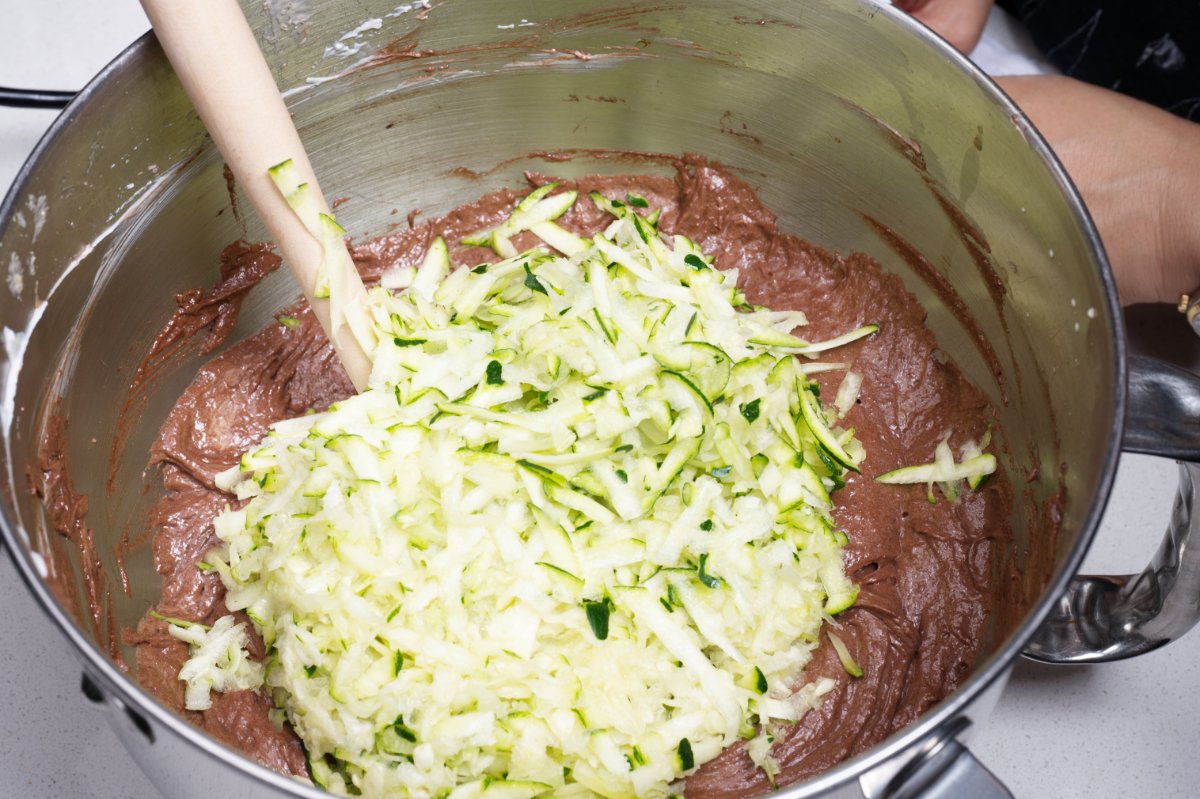
Once sifting is done, I grate the zucchini, our star ingredient. I’m going to be honest, when I look into my veggie bin, too often, I see a mushy zucchini staring up at me. Why are these things so hard to use up? In my never ending fight against wasted food, I decided I need more recipes that use up the things that I can rarely finish. This recipe uses 2 cups of packed shredded zucchini, which is about 2 small, 1 1/2 medium, or 3/4 a large one, just enough to get me over the hump. And there’s no tortured process of draining, squeezing, or rolling. Just shred it and use it.
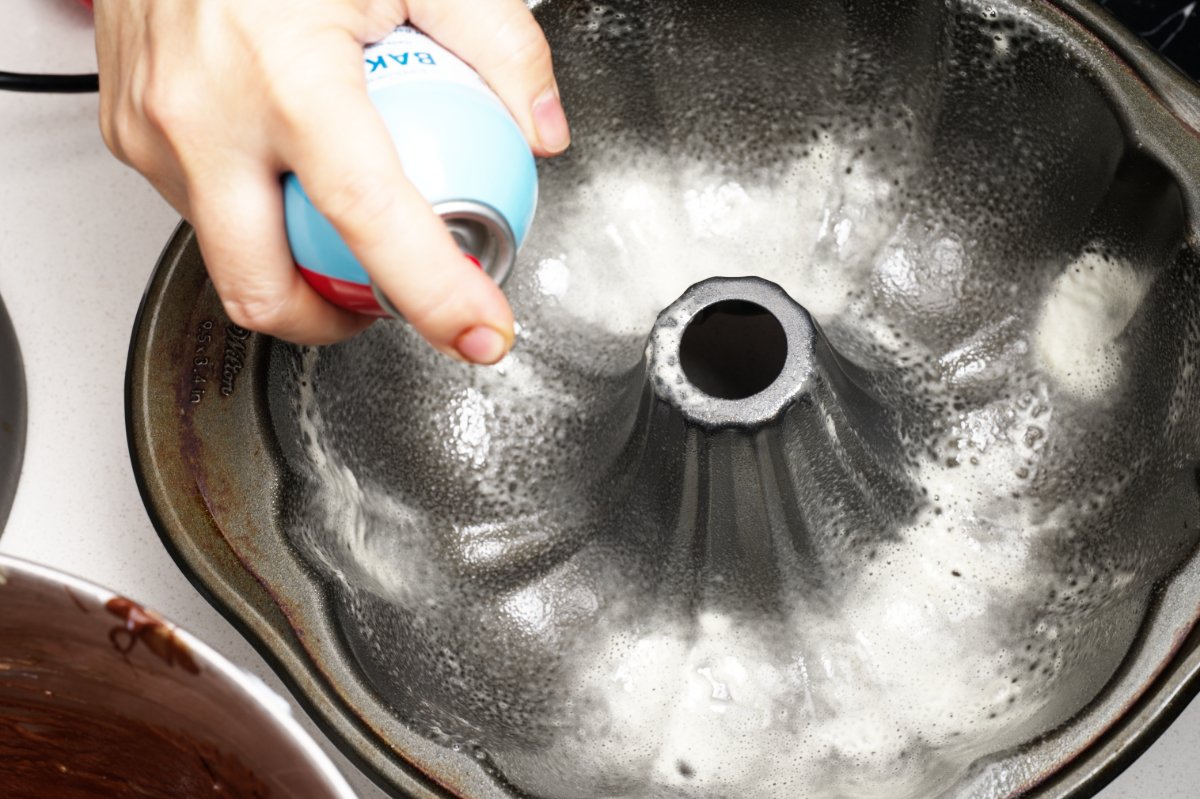
photo of grating the zucchini

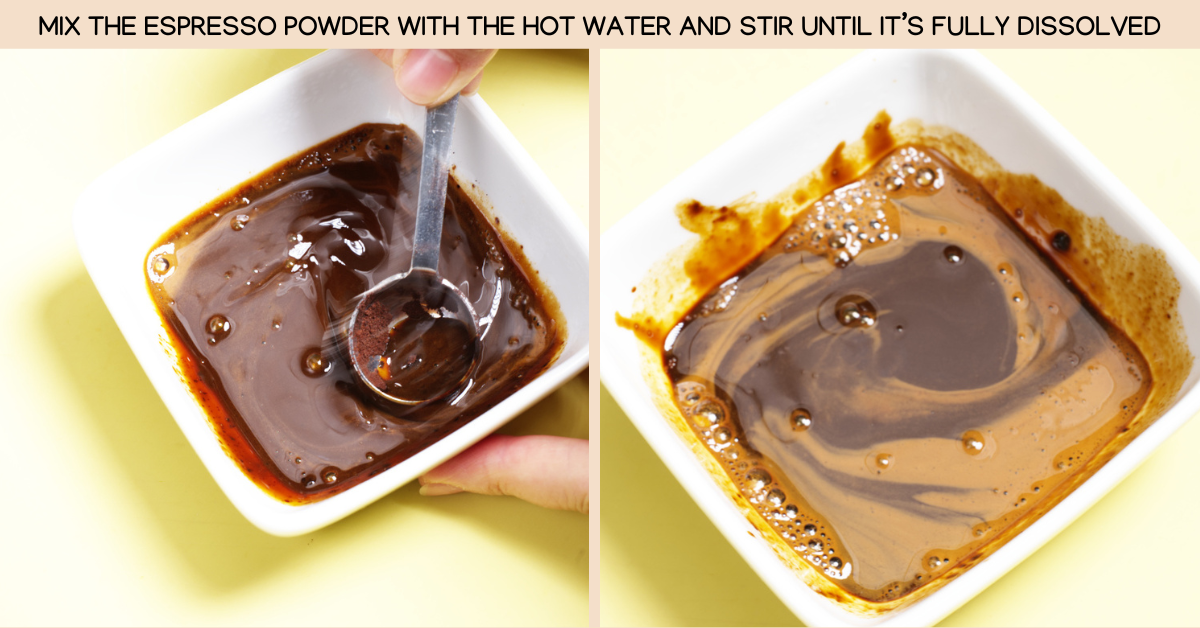
There’s one more little surprise ingredient-instant espresso powder. A small amount of coffee enhances chocolate flavor, making it deeper and richer, but not enough to impart coffee flavor to the cake. Dissolve it first in some hot water so it won’t be gritty in the Chocolate Zucchini Cake.
mixing espresso powder with water until smooth

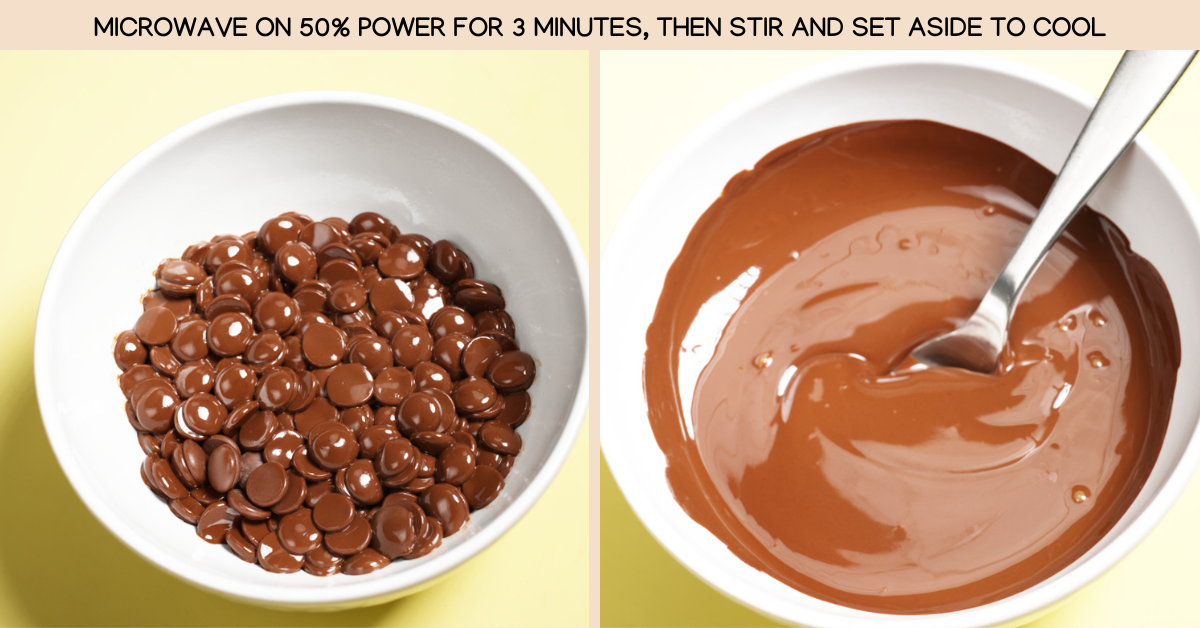
When I have all the other ingredients ready, I melt the chocolate. I find the microwave really great at this, but you could always melt it in a double boiler or a heatproof bowl set over a pot of simmering water. Make sure you are using chocolate that is made to melt. Chocolate chips that are meant for cookies are designed to hold their shape. I’m using chocolate wafers which, like regular bar chocolate, will melt.

The secret to using the microwave for melting chocolate is to lower the heat. Using it at full power will scorch your chocolate, making an inedible mess. Low and slow is the way to go. I drop my microwave to 50% power and it works perfectly. Although the chocolate may not look melted, once you stir it, it will turn into a lush puddle.

photo of the melted chocolate in bowls

Now it’s time to start putting it all together.

photo adding wet ingredients to bowl

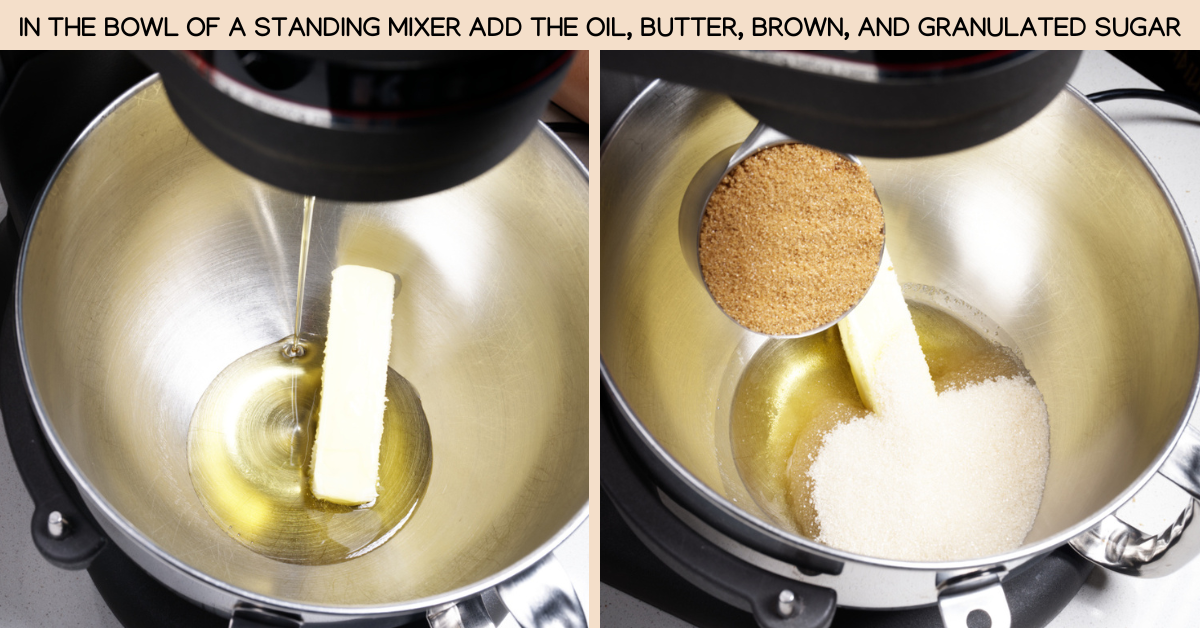
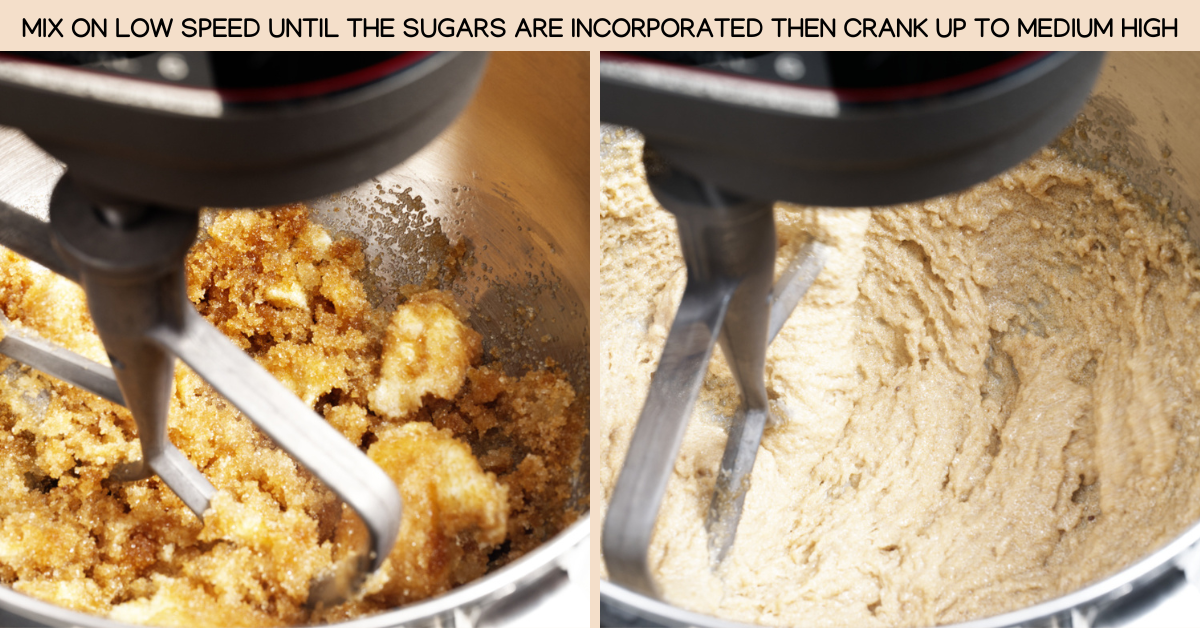
mixing the butter and sugars and oil

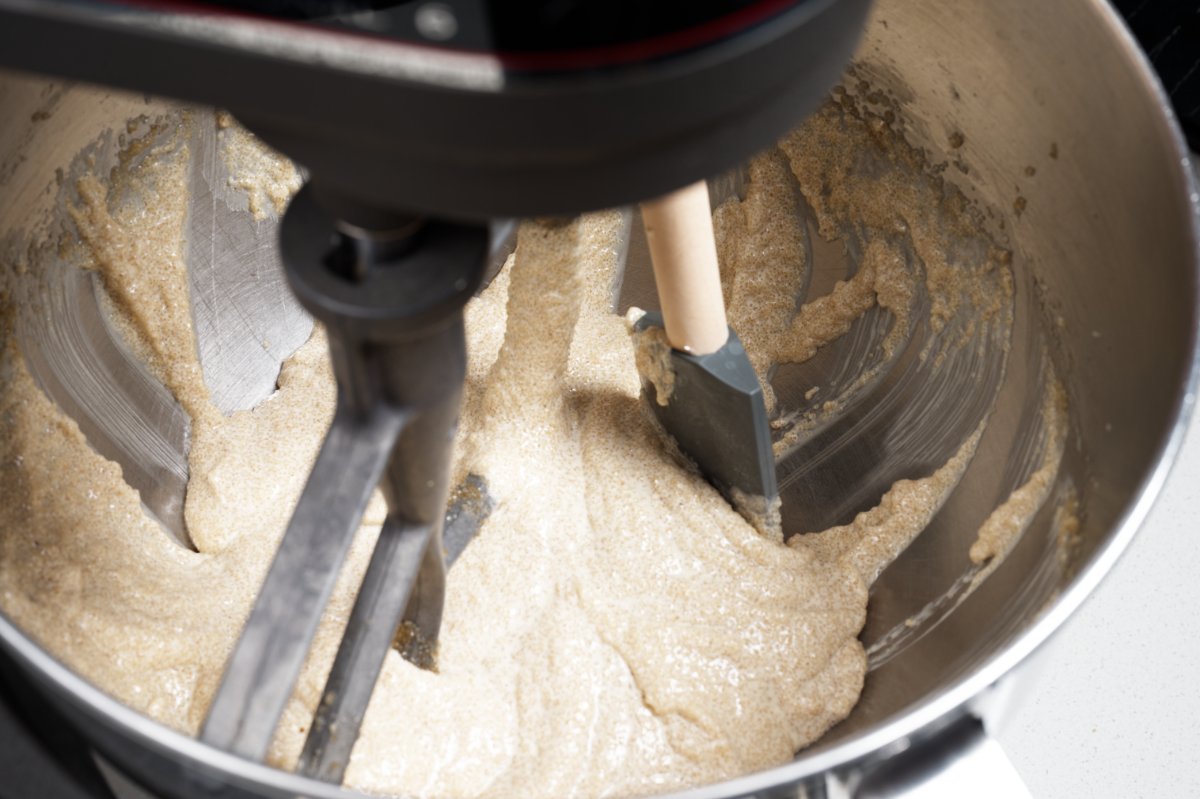
Mix for about 5 minutes, until thick and creamy:

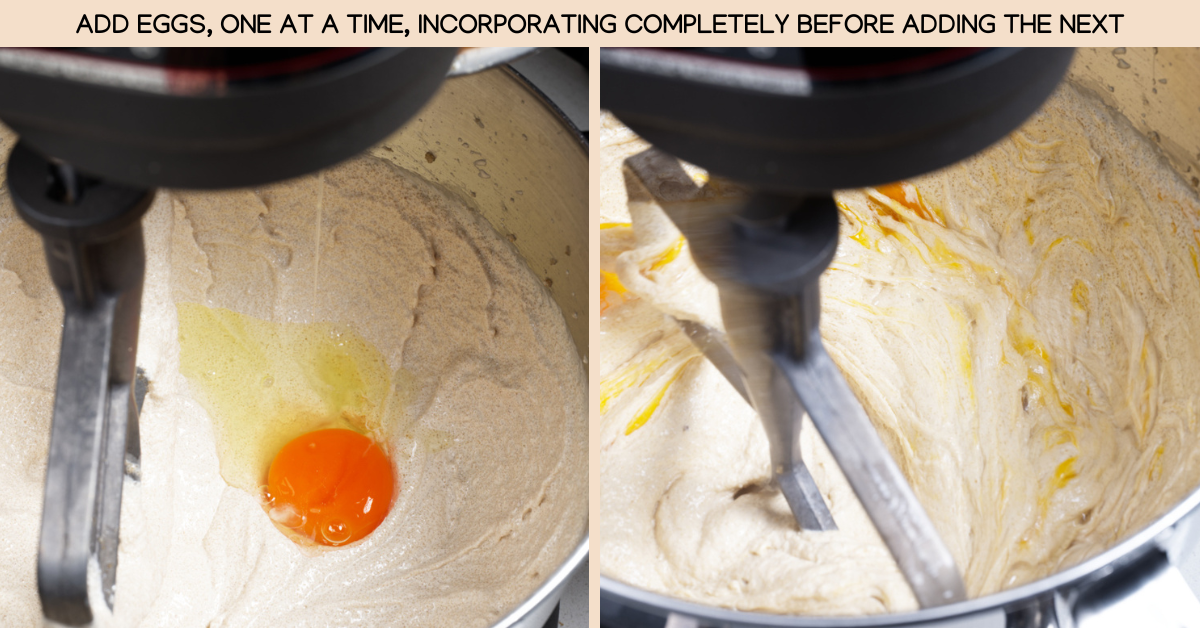
mixing in eggs one at a time

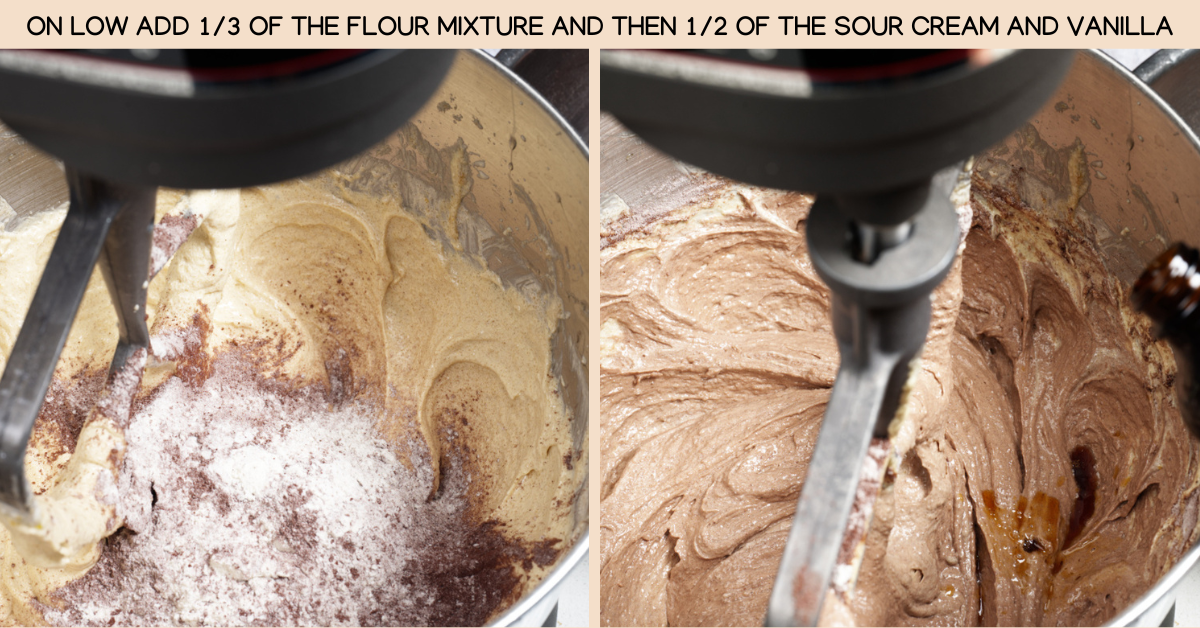
adding flour cocoa mixture and vanilla

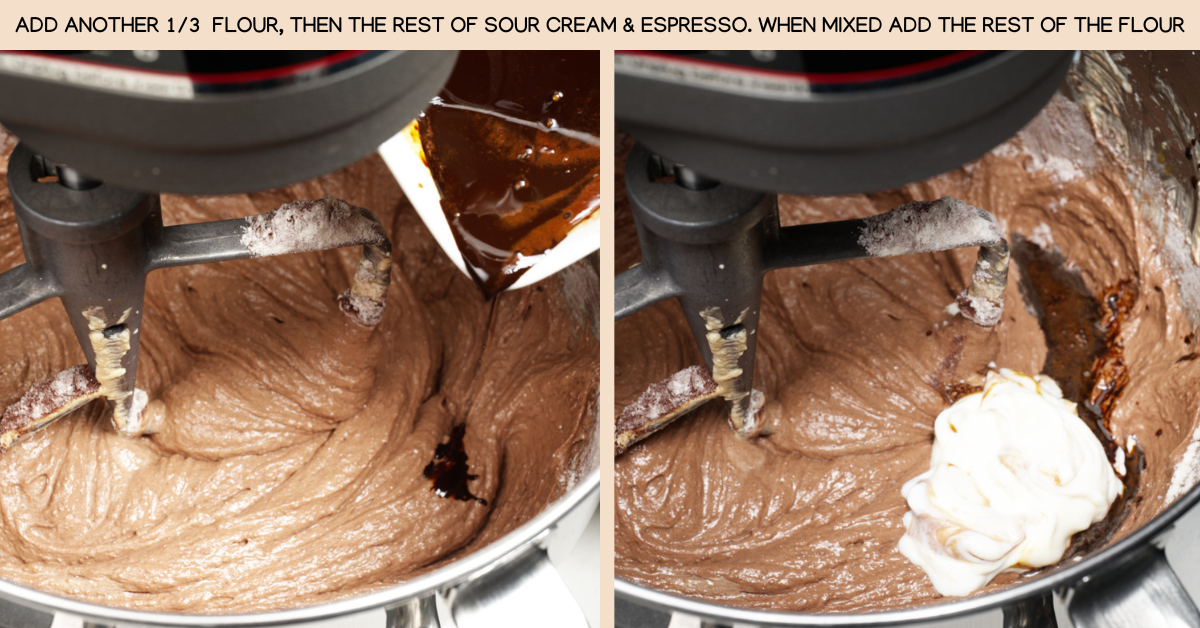
Once I’ve mixed in all the flour and cocoa mixture, alternating with the sour cream and vanilla and espresso, I take the bowl out and mix in the zucchini by hand.

mixing in the melted chocolate to the batter

Now this baby is ready to go in the oven. This batter makes a 12 cup Bundt cake. Make sure to really get baking spray in all the nooks and crannies of the pan so your cake releases perfectly.

spraying the bundt pan

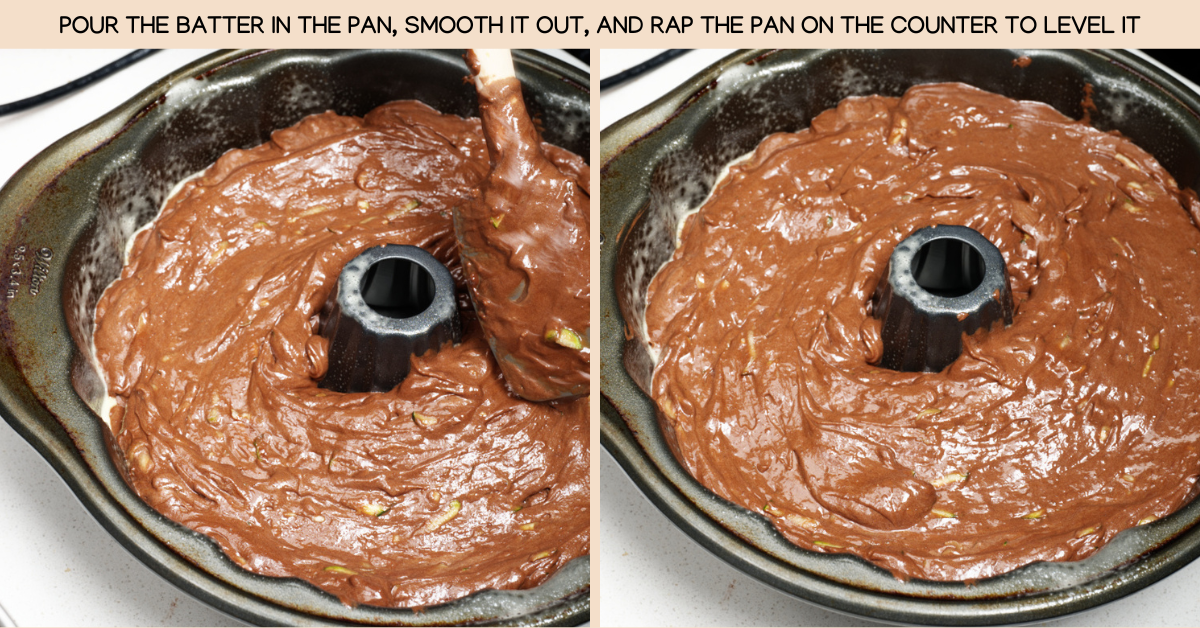
putting the batter in the bundt pan

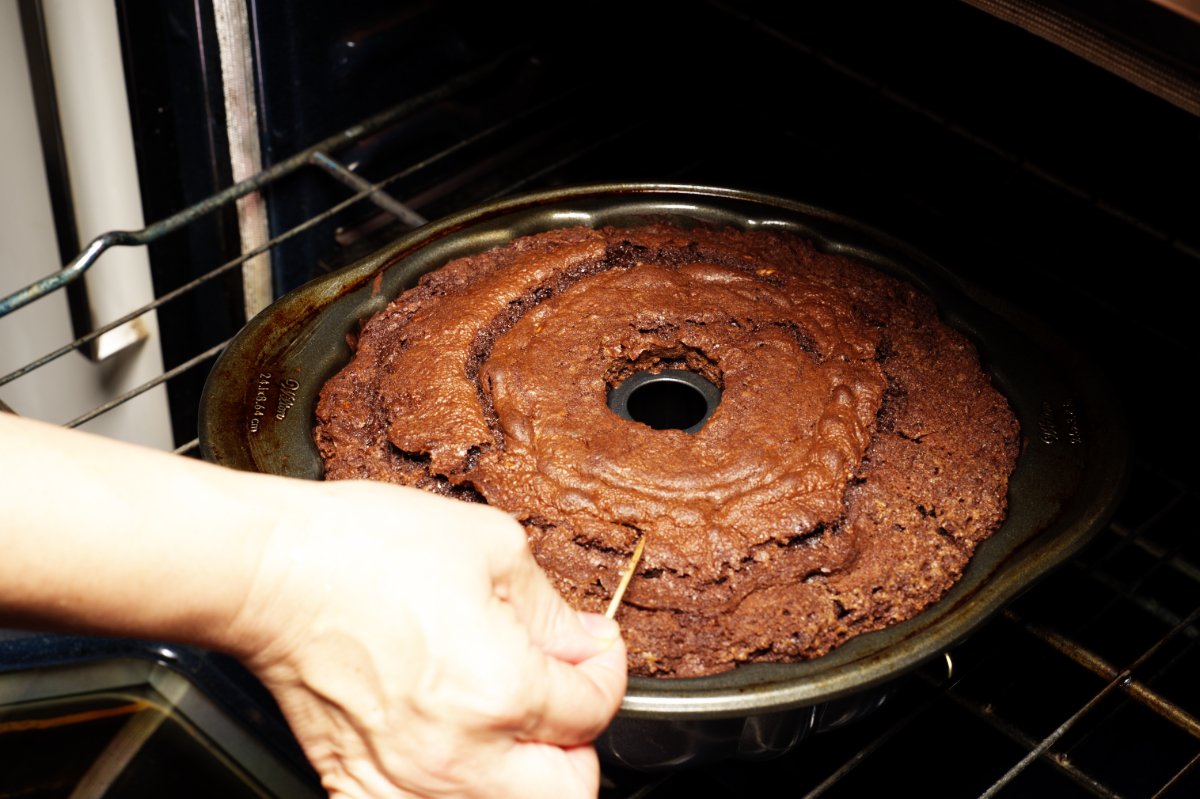
Bake the cake for 50-55 minutes; a toothpick test will show moist crumbs.

Cool for 10 mins in the pan before flipping it out gently, to finish cooling on a rack. Dust with some cocoa powder before serving.

Chocolate Zucchini Cake is certainly comfortable being served with some ice cream or whipped cream. But it’s also absolutely perfect on its own. I can’t wait for you to try it. Drop a comment on the recipe below, and remember to tag us in your pics @funkyasiankitchen, we love hearing from you!


Made this cake and still have more zucchini than you know what to do with? Try this Zucchini Jam, Lemon Zucchini, or Vegetarian Bibimbap!
 

Print
clock clock iconcutlery cutlery iconflag flag iconfolder folder iconinstagram instagram iconpinterest pinterest iconfacebook facebook iconprint print iconsquares squares iconheart heart iconheart solid heart solid icon
recipe card photo for chocolate zucchini cake

Chocolate Zucchini Cake

  • Author: Funky Asian Kitchen
  • Prep Time: 20 minutes
  • Cook Time: 55 minutes
  • Total Time: 1 hour 15 minutes
  • Yield: serves 12 1x
  • Category: sweets

Ingredients

Scale
  • 4 ounces (110 grams) unsalted butter, at room temperature
  • 1 cup (200 grams) lightly packed light brown sugar
  •  1 cup (200 grams) granulated sugar
  • ½ cup (120 ml) neutral vegetable oil 
  • 3 eggs, at room temperature
  •  2 ¼ cups (270 grams) all-purpose flour
  •  ⅔ cup (50 grams) Dutch-processed cocoa powder, plus a little more for dusting on cake
  • 1 teaspoon baking soda
  • ½ teaspoon sea salt
  • 2 teaspoons instant espresso powder mixed with 2 teaspoons hot water
  • 2 teaspoons vanilla extract
  • ½ cup sour cream
  • 2 cups (315 grams) packed grated zucchini
  • 6 ounces bittersweet or semisweet chocolate

Instructions

  1. Preheat the oven to 325 and move the oven shelf to the middle.
  2. Place the chocolate in a microwave safe bowl and microwave on 50% power for 3 minutes. It may not look melted, but it should smooth out once you stir it with a spoon. Set aside to cool.
  3. In a medium bowl, sift the flour, cocoa powder, baking soda, and salt together. Use a spoon or your hands to break up and push the cocoa powder through if it’s very clumpy.
  4. Combine the butter, oil, granulated sugar, and light brown sugar in the mixing bowl of a stand mixer. Add the paddle attachment and turn the mixer on low until the sugar and fats are combined. Then crank up the speed to medium high and beat for 5 minutes, scraping the bowl occasionally with a rubber spatula. The sugary mixture should look thick and creamy.
  5. Lower the speed to medium and add the eggs, one by one, making sure that each is well mixed before adding the next one. Scrape the bowl to make sure the eggs are well mixed.
  6. Lower the speed again to the lowest setting available. Add one third of the flour mixture and as soon as it’s combined, add ½ of the sour cream and the vanilla. Once that is combined, add another third of the flour mixture. Add the remaining sour cream and the espresso. Then add the final third of the flour mixture. Make sure to scrape the bowl between additions.
  7. Turn off the mixer and detach the bowl. It’s fine if the flour is not fully mixed and you see some streaks-you will mix the rest by hand.
  8. Add the shredded zucchini and mix it into the batter with a spatula, making sure to get to the bottom of the bowl. Once the zucchini is mixed, add the melted chocolate.
  9. Spray a 12-cup bundt pan with baker’s cooking spray, making sure you get all of the nooks and crannies. You can also grease the pan with butter and dust with cocoa powder if you prefer, just make sure you do this with a generous hand. 
  10. Pour the batter into the pan and lightly tap the pan on the counter so the batter settles into all of the grooves.
  11. Bake the cake for 50-55 minutes. A toothpick test should yield moist crumbs. 
  12. Let the cake cool for 10 minutes in the pan and then gently flip it over onto a cooking rack to fully cool. 
  13. Dust the cake with cocoa powder before serving.

Notes

*Use a kitchen scale for the best, most consistent results.

* You can use any bittersweet or semisweet chocolate, just make sure not to use baking chips, which will not melt and are made to keep their shape.

*You can substitute low fat sour cream (which is what I had) or full fat yogurt for the recipe with excellent results.

Keywords: chocolate, snacking cake, sweets, cake, zucchni